
Infrastructure Setup
As described in my previous blog post, my goal is to set up a nested vSphere homelab with NSX and Tanzu. If you are wondering about my motivation and hardware used for this setup, please read the Part 1 of this series. A little time has passed since the last entry and I unfortunately can't write these posts as fast as I would have hoped to so please excuse the long waiting time between the parts.
In this part I will go over the basic infrastructure configuration needed for this setup. I will briefly describe what I set up on my physical host regarding to Active Directory and DNS setup as well as network basic setup. The specific network configuration needed for NSX will probably be its own part, as this will be configured later and would be too much for this part.
Also I will need to set up some sort of shared storage for the nested ESXi hosts. They can not access the storage of the physical host and need some sort of storage. One way to achieve this would be to run vSAN, however I don't have that many resources to waste and vSAN itself needs some CPU and RAM to run. Another option would be to use the SSDs in my host to create some sort of iSCSI server for example with a virtualized TrueNAS. For that I'd need to either create some VMDKs on them or passthrough a dedicated controller for TrueNAS to see the storage. Third option would be to use my existing QNAP NAS and deploy on that. For that I would probably need to add a 10Gbit Ethernet adapter to the server, and I am not sure how well the nested ESXi would work with that. I guess I would have to try.
Prepare the physical host
First of course I needed to prepare the physical host. The hardware used for this is outlined in Part 0 of this series. So after assembling the whole system it's time to make some neccessary settings on it.
- If the system has IPMI (Intelligent Platform Management Interface) activate it and set an IP. It will make your life a lot easier. How to do that should be outlined in the documentation of the system. For my Supermicro system I would be able to get a DHCP IP and then login with the admin password. There was a sticker on the motherboard with the initial password to use. Some systems have this in another location or a default admin password. If you bought the system second hand and there is still a password set you might be able to reset it trhough the BIOS of the machine, but there are sure some steps found on Reddit or Google.
- While in the BIOS (either through remote console or directly) make sure that all the hardware is detected, e.g. all the RAM, all the CPUs, all PCIe devices etc. If something is not showing up consider reseating it or trying it on another platform if possible.
- If your BIOS has the option you might want to set your power and thermal settings. You might want to experiment with those.
You need to enable virtualization support in the BIOS. This is either Intel VT-x, AMD-V or SVM, depending on the system you're using. If you plan to passthrough hardware such as storage etc. you also need to enable Intel VT-d or AMD IOMMU. Depending on your motherboard it has either of these names.
After setting the BIOS values I was ready to install ESXi. This can either be done on IPMI (if available) or with an USB Stick. I chose the IPMI. The install is just as you would normally install ESXi so I won't go into any details here.
When it's done set the network on the host, either directly or through remote console. Now here is the the part where some decisions need to be taken:
- If you don't have a DNS server yet what do you put there?
- For the time being you can just add your router here until we create one
- Which network do you chose for that host?
- As we will need to create VLANs for NSX anyway we can either put it in the default VLAN (so your normal home network) or in a dedicated network together with your nested ESXi. More on that later. No matter what you do though, make sure they can route to each other.
In any case, we should now be able to connect to the ESXi by typing it's IP into a browser.
Network setup
No matter if you decide to put the physical and nested ESXi into your normal network (e.g. 192.168.1.0/24) or another one, you need to have something to create and route VLANs, so for example a Layer 3 switch or a router (which can do VLANs so something better than provided by your ISP). You have different options, here are some of them:
- You have a good router already for your whole network (e.g. Ubuquiti Edge Router, Unifi Dream Machine, Mikrotik CSR series etc.) If you have that you're probably familiar with what I'm talking about.
- You have a Layer 3 (or at least Layer 2+) Switch in your LAB (so a switch that can route between VLANs) which can be used as a gateway for that.
- You put a router in front of your lab, so that your existing network is unaffected and you just route your lab traffic through there
- You put a virtual router in your lab, can be pfSense, opnsense, vyos etc.
However, no matter what you do, you will need some networks. In my case I created these on my Aruba switch:
| Network | VLAN | Network |
|---|---|---|
| Management (optional) | 53 | 10.80.53.0/24 |
| NSX TEP | 101 | 10.80.101.0/24 |
| NSX Edge | 102 | 10.80.102.0/24 |
You need to set a gateway. This is either an interface IP if it is a switch or a gateway if it is a router. I set mine to .1 normally, but some people prefer to have .254, whatever you prefer.
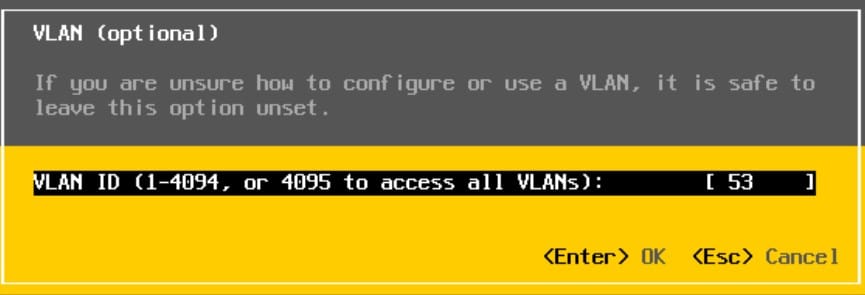
The management network is optional, however I like to have it so that my lab is completely isolated from my home network. I use all tagged switchports, so I set the VLAN on my physical ESXi host in the network settings in order to put the host in to this network.
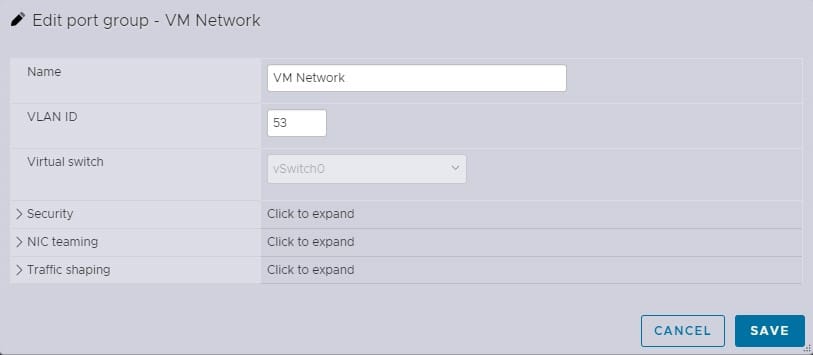
I also want my DNS, vCenter etc. in this network. Therefore I just set the VM Network on the host to this one:
DNS
You will need a DNS Server in order to install a vCenter. In theory this could be done without one, but realistically you want and need one, especially for the later steps of this (NSX, Tanzu, etc). You have some options, either a Windows DNS, bind9, PowerDNS etc. I setteled for a Windows Core Server here. Reason being that I don't need the GUI on that server there as I have RSAT (remote server administration tools) installed on my system anyways. So I just install a small Windows Server 2022 with 2vCPU and 4GB of RAM (could go with even less realistically) without the Desktop Experience.
Now at this point the question is, where to install these VMs? We don't have any shared storage set up but as these VMs will remain on the physical host anyways they don't really need to. Depending on what you have installed in your server you might or might not have a local datastore now. I installed ESXi on a 1TB nVME Disk. The installation size of ESXi will change, according to the size of your disk but will consume a maximum of 138GB of space on your disk. This means that if you have a 400GB or larger disk you should have enough space left on there for at least some VMs like DNS and potentially even vCenter. So in my case I install it locally.
Set the VM up like you usually do. Take the DNS you're familiar with. I also installed an Active Directory however, this is optional and not needed.
Once you've set up your DNS you need to create the forward- and reverse lookup zones for your management network. The forward zone is just your desired domain name. You don't actually need to have registered that domain but you want to take something that is not used to avoid lookup problems.
Do not take chose a .local domain, as this can lead to problems with some applications. At one point you couldn't deploy Tanzu with a .local domain (but this is fixed now afaik). However I feel like it is worth it to avoid the headache and not put .local. You can take another tld which is not publically available like .lab or a subdomain like internal.example.ch or anything else.
The reverse lookup zone in my example would be 53.80.10.in-addr.arpa.
After that you need to add at least one entry to the DNS, your future vCenter. Add this, including pointer, in order not to get an error when installing vCenter later.
vCenter
In a similar fashion, install the vCenter on to the host like you would normally do. I chose the only network I had available (VM Network) and my local datastore. Make sure you enter the same IP and Hostname you chose in your DNS entry as otherwise you will encounter an error in Stage 2 of the vCenter setup as the lookup will fail.
After that I just verify that the vCenter is starting correctly and I am able to login. The next steps will be to configure the networking, install my nested ESXi hosts and then later install NSX and Tanzu on those nested hosts. The nested setup will be described in the next part of this blog post.