
In the last post we discussed how to create a Rancher Cluster on vSphere. As promised, in this part we look on how to implement the vSphere CSI into that cluster. But first, what is a CSI?
Kubernetes CSI
A Kubernetes CSI is a Container Storage Interface. It is, in essence, a driver that is installed into the Kubernetes nodes that allows them to utilize external storage. Without the presence of a CSI you can only use volumes that either reside directly in the container in the pod or on the node itself, which brings with it a few problems.
If all your containers only store ephemeral data, which is data that doesn't need to be retained and is only there for the runtime of the app, then you don't need persistent storage. This might be true if your container is a static website that does not need to retain any data created during running it, or a container that interfaces directly with a database or something else that is external to the container. It is also often true for logfiles or anything of that sort although here you lose the ability to look at your logs after the container has stopped for whatever reason.
Also, if you place your volumes directly on a node, that container can only run on this node. This means of course the container can not run in high availability mode or even be evacuated in case of a node upgrade or any other reason this node becomes inaccessible.
The options to prevent this from happening is to either store data on a NFS volume that is mapped to all the nodes, in an object storage somewhere else or in a persistent volume. This persistent volume (or PV) can either be on some sort of shared storage between the nodes with CEPH or, like in the case I'm going to demonstrate, on a vSphere datastore. This is what the vSphere CSI is used for. If you create a PV in a storage class that has vSphere CSI as its backend, there will be created a VMDK which is attached to the nodes and is used as a PV for your data.
Preparation of vCenter
First things first though, access the cluster you have created in the part before this. If you run the command kubectl get storageclasses you will see that there are none yet.
> kubectl get storageclasses.storage.k8s.io
No resources found
So we need to create one. First though, you need to create a policy in vCenter on one or more datastores, so that Rancher knows which datastores to place the volumes on. Also we will be using tag based placement, so create a tag. Go to vCenter and in the Menu click on "Tags & Custom attributes". Click on new and fill it out to your liking something like this:
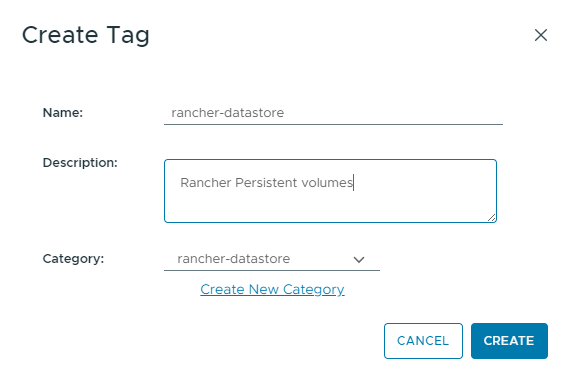
It doesn't matter what you chose for name and category, just chose something you can find in the future again.
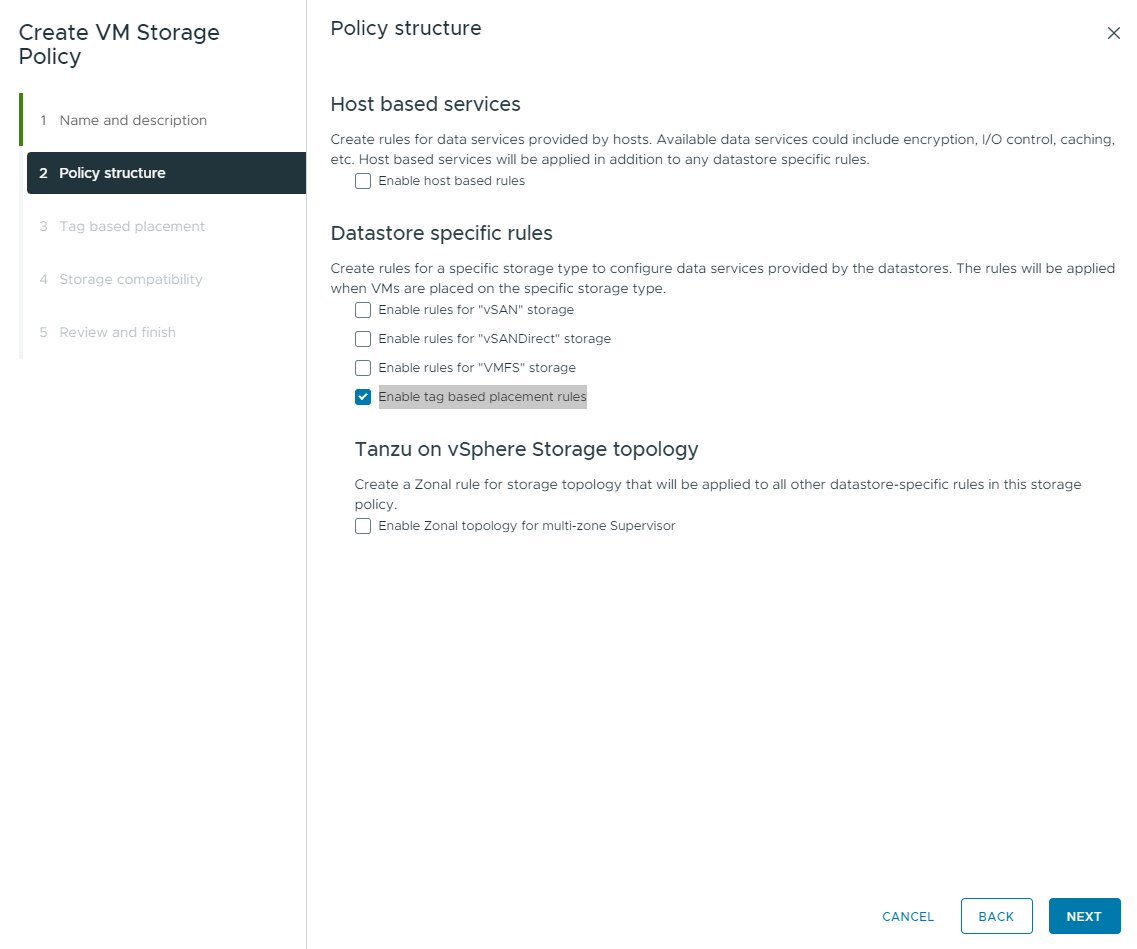
In the vCenter server then go to the Menu and then on "Policies and Profiles" and select "VM Storage Policies". Click on Create.
Chose any name you like for this and in the next step activate the "Enable tag based placement rules" checkbox.
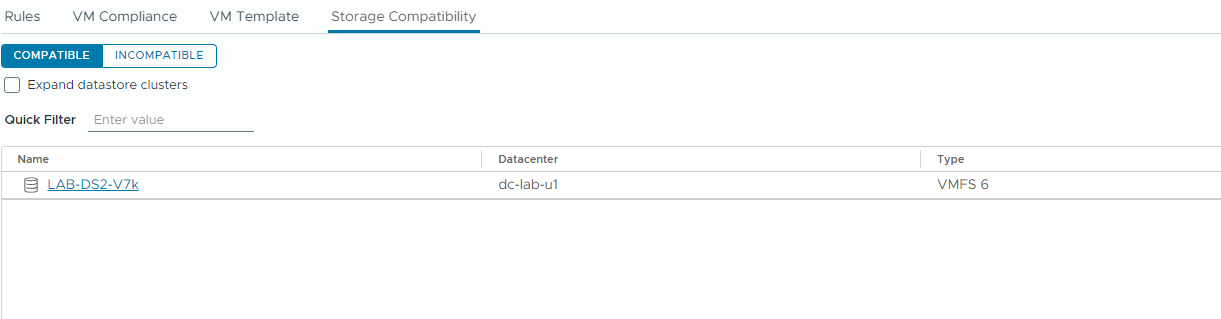
In the next step chose the category and the tag created before. Don't worry that you can't see any datastore in step 4 yet, as we have not assigned the tag to the datastore yet. Create the policy and head to the datastore view in inventory. In tags assign the just created tag to one of your datastores.
If you now go back to your policy and select "storage compatibility" on the tab below you should see your datastore.
If this is all done we can go to the next step within your rancher cluster.
Install the CSI in your cluster
Select your cluster, go to manage and select "Apps -> Charts" in the menu to the left.
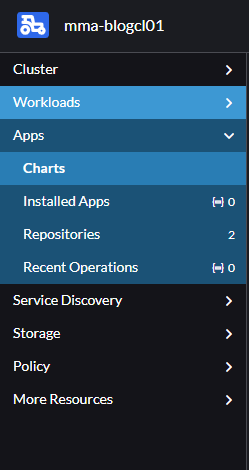
In the filter type "vSphere and click on the "vSphere CPI" chart. On the top right you now see a button called install. Click that and then click next.
This is the cloud provider addon that needs to be installed first, before the CSI can be installed. The installation is quite straight-forward, all you need to fill out is the username of either he "Administrator@vsphere.local" or a service account you have created for Rancher here. Also fill in the Datacenter in vSphere:
Click on install on the bottom right and after a few seconds you will see the install state on the bottom of the screen. Give it a few minutes and hopefully after a short while you should see:
helm install --labels=catalog.cattle.io/cluster-repo-name=rancher-charts --namespace=kube-system --timeout=10m0s --values=/home/shell/helm/values-rancher-vsphere-cpi-104.0.1-up1.8.1.yaml --version=104.0.1+up1.8.1 --wait=true vsphere-cpi /home/shell/helm/rancher-vsphere-cpi-104.0.1-up1.8.1.tgz
NAME: vsphere-cpi
LAST DEPLOYED: Thu Dec  5 15:37:07 2024
NAMESPACE: kube-system
STATUS: deployed
REVISION: 1
TEST SUITE: None
---------------------------------------------------------------------
SUCCESS: helm install --labels=catalog.cattle.io/cluster-repo-name=rancher-charts --namespace=kube-system --timeout=10m0s --values=/home/shell/helm/values-rancher-vsphere-cpi-104.0.1-up1.8.1.yaml --version=104.0.1+up1.8.1 --wait=true vsphere-cpi /home/shell/helm/rancher-vsphere-cpi-104.0.1-up1.8.1.tgz
---------------------------------------------------------------------
Go back to the charts section and select the other vSphere chart in there, named "vSphere CSI". Click on install and next aswell here and fill it out.
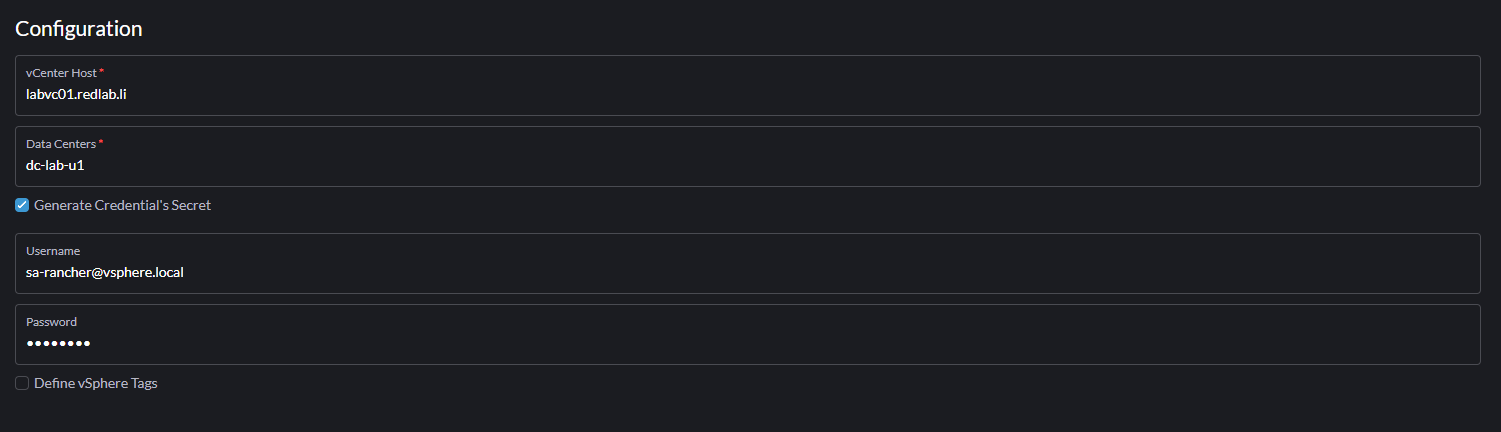
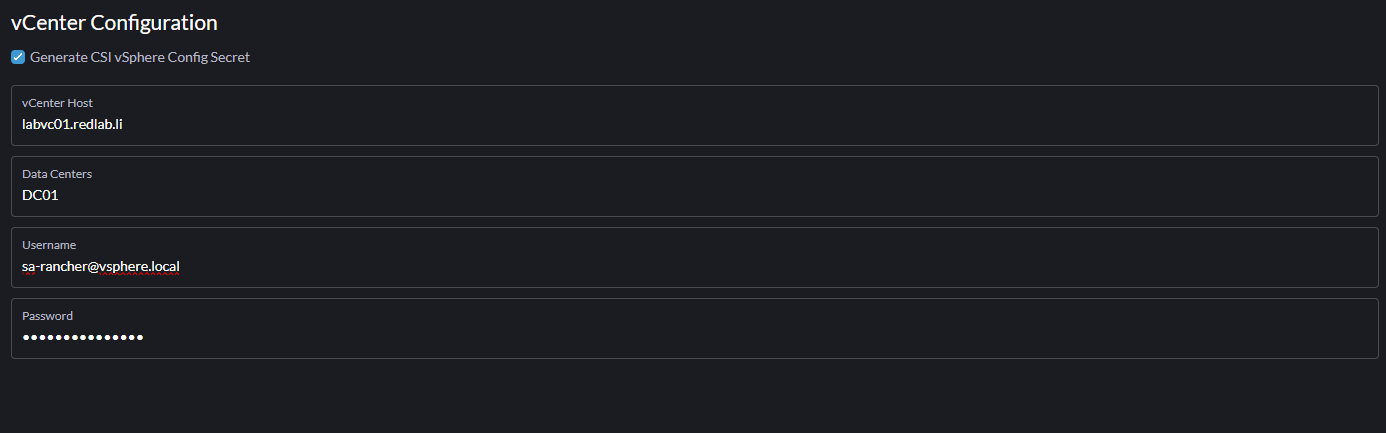
Here now is the important part of this install. Fill out the details of your vCenter in the first section. Either specify the "Administrator@vsphere.local" or a service account you have created for Rancher here. It should look something like this:
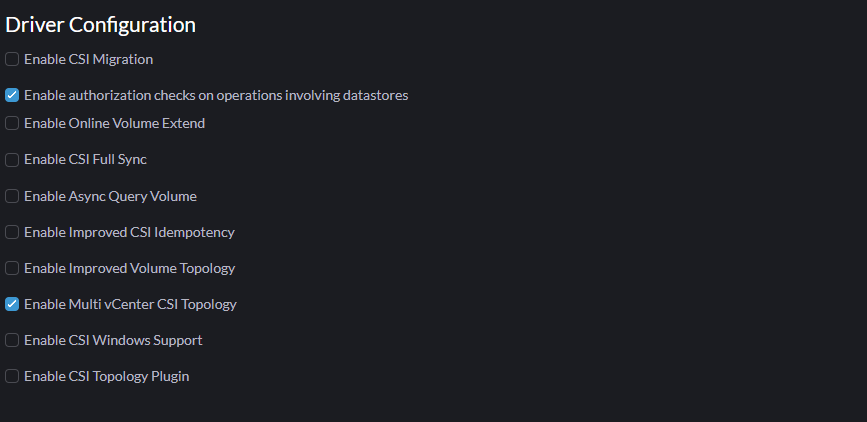
In the "Driver Configuration" tab you can leave the defaults for now. If you want you can try some other options here but for now the defaults are fine.
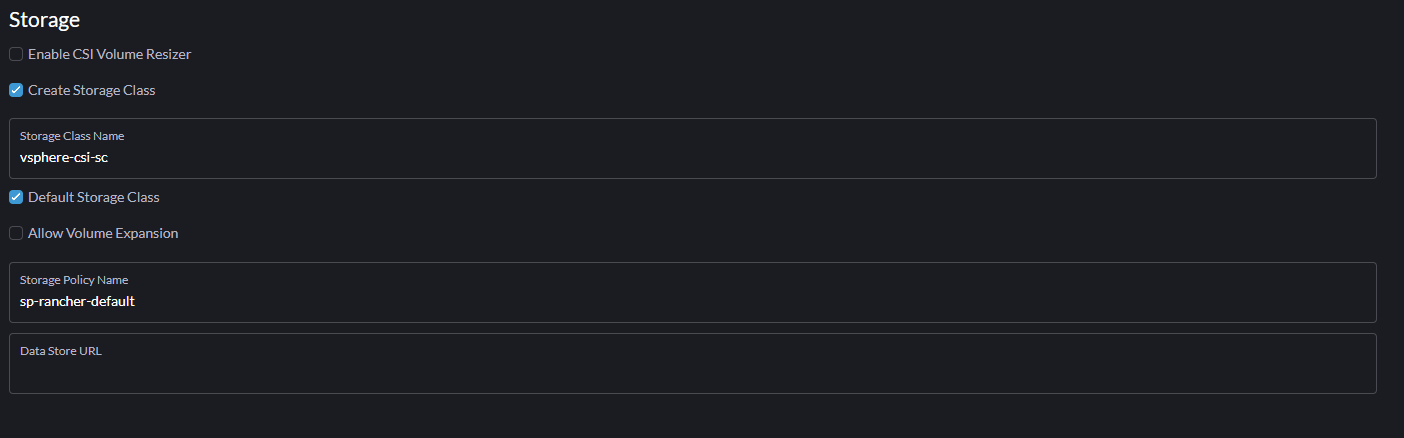
In the next tab you need to fill out the name of the policy you created above, so that Rancher knows where to place the plugins. Also you can chose a name for your Storage Class name. If you only specified one datastore with the tag, you can leave the last field empty as there is only one datastore anyways:
The last tab for node configuration can be left empty and is not relevant to standard implementations as we are doing now.
Click on install on the bottom right and after a few seconds you will see the install state on the bottom of the screen. Give it a few minutes and hopefully after a short while you should see a message saying Success.
Check if you can see the newly provisioned storageclass by running kubectl get storageclass again. You should now see the following:
> kubectl get storageclass
NAME                       PROVISIONER              RECLAIMPOLICY   VOLUMEBINDINGMODE   ALLOWVOLUMEEXPANSION   AGE
vsphere-csi-sc (default)   csi.vsphere.vmware.com   Delete          Immediate           false                  55m
Which means you now have a storageclass with the vSphere CSI installed. Next we test it.
Test the CSI
In order to test if everything is working as intended we will create a PVC (Private Volume Claim) and a Pod that attaches to it. The provider (in this case vSphere) will then create a PV for us.
First we create the PVC with a YAML file. You can use this example or create your own:
apiVersion: v1
kind: PersistentVolumeClaim
metadata:
  name: test-pvc
spec:
  accessModes:
    - ReadWriteOnce
  resources:
    requests:
      storage: 200Mi
  storageClassName: vsphere-csi-sc
Replace the storageClassName with what you chose when installing the CSI. Apply it and see its status with kubectl get PVC -A
kubectl get pvc -A
NAMESPACE   NAME       STATUS   VOLUME                                     CAPACITY   ACCESS MODES   STORAGECLASS     VOLUMEATTRIBUTESCLASS   AGE
default     test-pvc   Bound    pvc-aad38cd6-0b1a-400f-851c-4a071eca2357   200Mi      RWO            vsphere-csi-sc   <unset>                 5s
You see that the PVC has been created and there is a volume associated with it. So far so good. You also should see in vCenter that some tasks, including updating container volumes have run. This means that vCenter has created a VMDK in which this volume now was created and attached.
This is because normal vSphere datastores don't support RWX volumes, only vSAN datastores with activated file services can be used for RWX modules.
Not let's create a deployment to utilize this. I use a alpine test that I found a while ago to see that the volume is actually working:
apiVersion: apps/v1
kind: Deployment
metadata:
  name: alpine-test
spec:
  replicas: 1
  selector:
    matchLabels:
      app: alpine-test
  template:
    metadata:
      labels:
        app: alpine-test
    spec:
      containers:
      - name: alpine-test
        image: alpine
        command: ["/bin/sh", "-c", "while true; do echo $(date) >> /mnt/data/date.txt; sleep 1; done"]
        volumeMounts:
        - name: data-volume
          mountPath: /mnt/data
      volumes:
      - name: data-volume
        persistentVolumeClaim:
          claimName: test-pvc
Apply this and first run kubectl descripe pod alpine-test-* (replace the star with the actual name of the pod) and you should see at the bottom in events, that the volume has been attached.
kubectl exec alpine-test-f94c694c9-cfrp5 -- cat /mnt/data/date.txtThis should now export a list of your time and data in an increment of 1 second. If it does and is current, then everything has worked.
Conclusion
Now he have successfully attached a Volume on vSphere to our cluster. In the next step we will create a new cluster that is fully implemented into vSphere by doing all this stuff right at the creation of the cluster and also install the Antrea CNI on it. This will allow us to integrate this cluster into NSX and therefore apply DFW rules on the pods in it. Stay tuned.